Few things transform a vehicle’s appearance—and value—like a fresh coat of paint. Whether you’re restoring a classic car or refreshing your daily driver, mastering car painting techniques ensures a professional finish that protects your investment and turns heads. But where do you start? Let’s break down the tools, preparation, and application methods that deliver flawless results, even for DIY enthusiasts.
Essential Tools and Equipment
Before diving into your project, gather the right gear. Quality tools are the backbone of any successful car painting job.
Car Painting Tools and Equipment Checklist
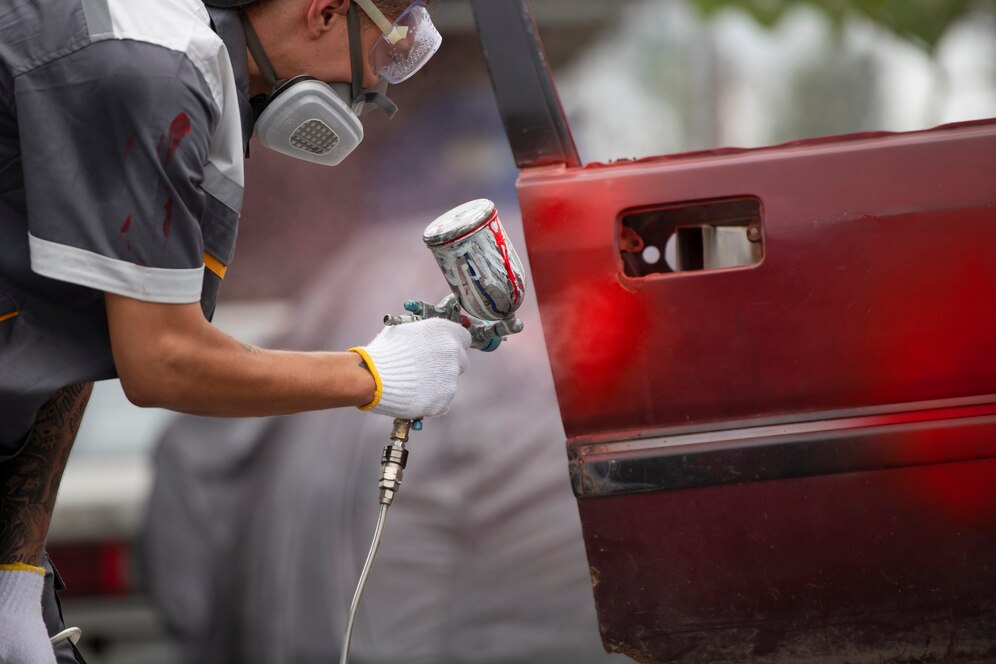
Start with safety: a respirator mask, gloves, and goggles shield you from fumes and debris. For sanding, arm yourself with 400- to 2000-grit sandpaper, an orbital sander, and tack cloths to wipe away dust. A high-volume, low-pressure (HVLP) spray gun ensures even coverage, while an air compressor (ideally 60+ gallons) powers your setup. Don’t forget mixing cups, strainers, and masking supplies to protect trim and windows.
Achieving a Professional Finish
A dust-free, ventilated workspace is non-negotiable. Consider a portable spray booth or hang plastic sheeting in your garage to contain overspray. Lighting matters too—bright LED lights help spot imperfections before they’re sealed under paint.
Understanding Car Paint Options
Not all paints are created equal. The right choice depends on durability, finish, and your skill level.
Best Paint for Vehicles
- Urethane: Durable and glossy, ideal for long-lasting finishes. Requires a hardener and clear coat.
- Acrylic Enamel: Budget-friendly and easy to apply, but less resistant to UV damage.
- Water-Based: Eco-friendly and low-odor, though less common for DIYers.
Different Paint Finishes
- Gloss: Classic shine but shows imperfections.
- Matte: Modern and edgy, but demands meticulous maintenance.
- Metallic: Adds depth with flecks of aluminum, requiring skilled application.
Body Work and Preparation
A flawless paint job starts with a flawless surface. Skipping prep work guarantees a subpar result.
Repairing Dents and Scratches
Use body filler for small dents, sanding it smooth once cured. For rust, grind down to bare metal, treat with a converter, and seal with epoxy primer.
Sanding Techniques
- Coarse Grits (400-600): Strip old paint and level surfaces.
- Fine Grits (1000-2000): Smooth primer and blend edges. Always sand in one direction to avoid swirl marks.
Priming for Success
Apply self-etching primer to bare metal, followed by high-build primer to fill micro-scratches. Sand between coats for a glass-smooth base.
Step-by-Step: How to Paint a Car
Beginner’s Overview
- Clean Thoroughly: Degrease panels with wax remover.
- Mask Off Areas: Cover windows, lights, and trim.
- Mix Paint: Follow manufacturer ratios for paint, thinner, and hardener.
- Test Spray: Adjust the gun’s pressure (typically 25–30 PSI) and pattern on cardboard.
Primer to Clear Coat
- Base Coat: Apply 2-3 thin layers, allowing 10–15 minutes of “flash time” between coats.
- Clear Coat: Add 2-3 layers for UV protection and gloss. Keep the gun 6–8 inches from the surface.
Safety First
Work in a well-ventilated area, and never skip the respirator. Store rags and solvents away from sparks.
Mastering Spray Techniques
Equipment Setup
- Nozzle Size: 1.3–1.4 mm for base coats; 1.4–1.6 mm for clear.
- Overlap Passes: Aim for 50% overlap to prevent stripes.
Controlling Spray Patterns
Move the gun in smooth, horizontal strokes, keeping it perpendicular to the surface. Start spraying before the panel and release after passing it to avoid buildup.
Avoiding Common Issues
- Orange Peel: Caused by thick paint or incorrect thinning. Sand and polish.
- Runs: Sand the area once dry and reapply.
Blending Paint and Touch-Ups
Matching Colors
Locate your car’s paint code (often on the door jamb) for an exact match. Blend touch-up paint by feathering edges with 1500-grit sandpaper.
Panel-by-Panel Approach
Mask adjacent panels but leave a 2–3 inch border to blend new paint into old. Finish with clear coat and polish.
Car Panel Repaint and Maintenance
When to Repaint
Address deep scratches, rust, or fading promptly. Partial repaints require careful blending to avoid mismatched shades.
Protecting Your Paint
- Wax Every 3 Months: Guards against UV rays and contaminants.
- Park in Shade: Prolongs color vibrancy.
Finishing Touches
Sanding and Polishing
After the clear coat cures (48–72 hours), wet-sand with 3000-grit paper, then polish with a dual-action buffer.
Troubleshooting
- Fisheyes: Caused by silicone contamination. Clean surfaces thoroughly before repainting.
FAQs
Can I paint my car in an open garage?
Yes but shield the area from wind and dust. Dampen the floor to minimize airborne particles.
How to achieve a professional finish at home?
Patience and prep. Invest time in sanding, masking, and testing your spray technique.
Average cost to paint a car?
DIY: 300–300–1,500 (materials). Professional: 2,000–2,000–10,000+, depending on quality.
Conclusion
Car painting Mornington is equal parts art and science. With the right tools, meticulous prep, and controlled spray techniques, even novices can achieve showroom-quality results. Remember, the secret lies in patience—rushing leads to drips, dust nibs, and frustration. Start small, practice on scrap panels, and soon you’ll master the skills to revitalize any vehicle. Ready to transform your ride? Grab that spray gun and let creativity (and careful planning) take the wheel!